
Scannable prints NFC labels on your label printer and links each tag to its serial. Scannable connects the printer for you. After that, your Admins choose who can print to it, and anyone with access can print from Production or the mobile app.
Get a printer connected
Email support@scannable.io with the printer's ID. Scannable adds it to your account and sets it up:
- Name, as it shows in Select printer. Ask for the name Default if you want it picked first.
- Label size: 18 mm or 30 mm. See Label previews.
- Single or double labels: one or two labels for each serial. See Printing single or double rope labels.
- Logo: the logo printed on your labels.
To rename, change or remove a printer, contact support too.
Until your account has a printer, the mobile app shows Set up a label printer when you try to print.
Choose who can print to each printer
Admins choose which printers each team member can use.
- Go to the Team page.
- Open the team member's menu and select Assign printers.
- Under Select printers, choose one or more printers.
- Select Assign.
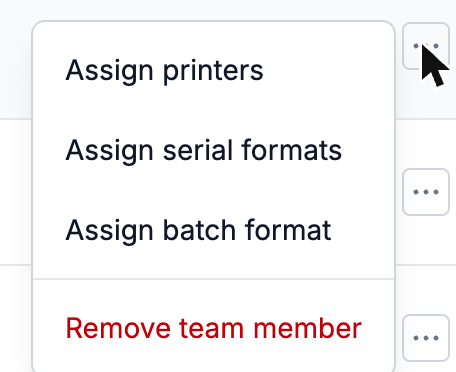
A team member with no printers assigned can use every printer in your organisation. Once you assign one, they see only the printers assigned to them.
Assign printers shows only when your organisation has at least one printer.
Label templates
The label template sets the layout: which data goes where on the label. Scannable sets up your templates. It can give a different template to a product category, a product or a single SKU.
When the templates differ, the most specific one is used:
- The SKU's template
- The product's template
- The product category's template
If none is set, the standard layout is used. To change a template, contact support.
Print labels
- In Production, choose your printer in Select printer.
- Open the menu on an order or a run.
- Choose Print first label to check one label, then Print all.
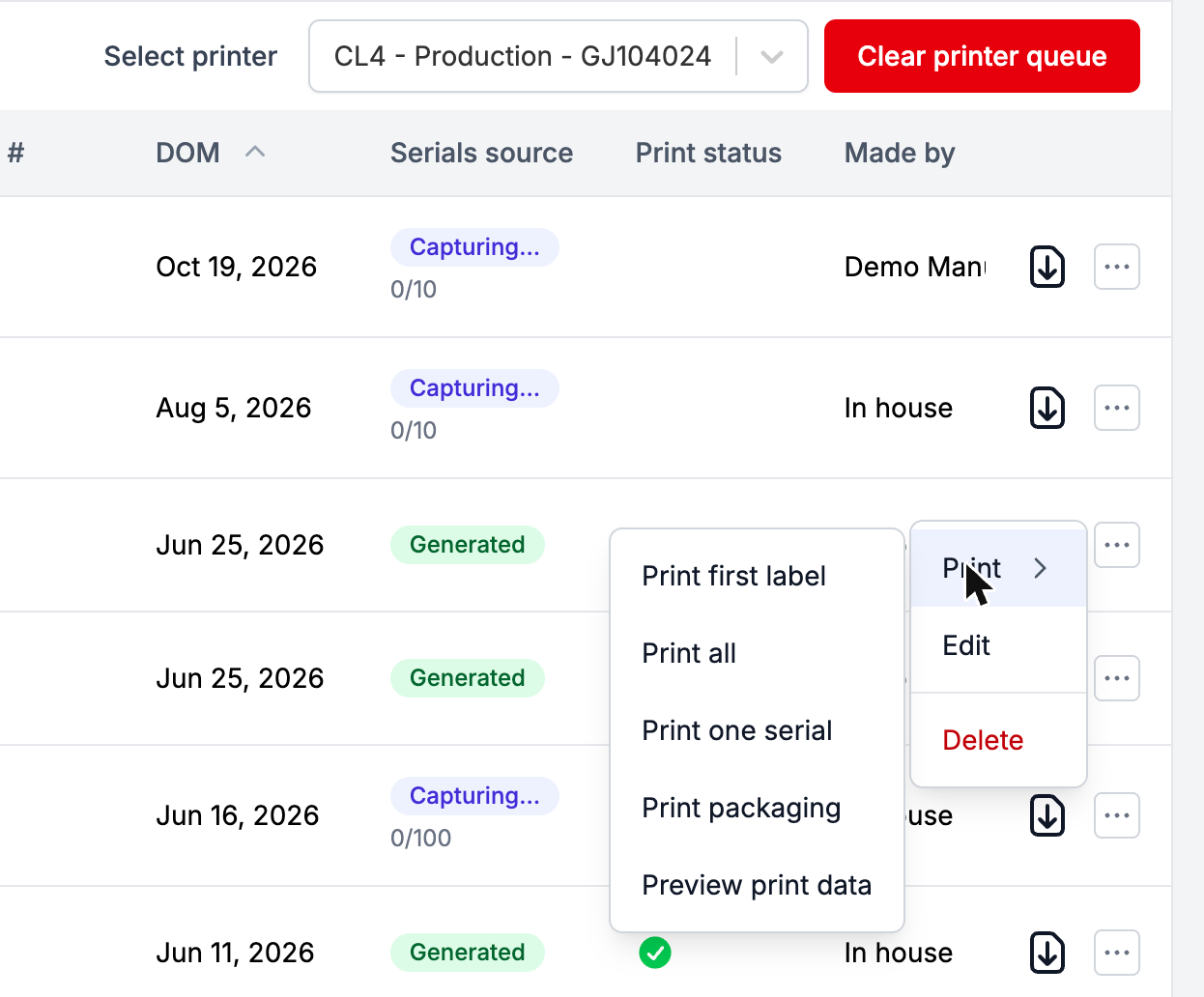
To reprint a single label, choose Print one serial. Search for the serial in Serial number, then select Print.
See NFC rope label printing for each option.
From the mobile app
- Open the Production tab and find the run.
- Open its menu and tap Print.
- Under Scope, choose Print all or Print first label.
- Under Printer, choose your printer, then tap Print.
The app can't print one serial, reprint failed labels or clear a printer queue. Use Production on the web for those. See The Scannable app for manufacturers for the rest of the app.
Follow a print job
A label counts as printed once the printer reads back its NFC tag and Scannable links the tag to the serial. Sending a job to the printer is not enough.
The Print status column in Production shows an icon for each order and run. Hover over it to see its name.
| Icon | Print status | What it means |
|---|---|---|
| Spinning circle | Pending | Labels are printing, and Scannable is linking their NFC tags. |
| Green tick | Complete | Every serial is linked to an NFC tag. |
| Red printer | Check printer | One or more serials did not get an NFC tag. |
No icon means nothing is printing: the order hasn't been printed, or its queue was cleared.
Scannable checks the printer about once a minute, so the status can lag behind the printer. Print first label and Print one serial don't change the status.
Fix failed prints
When an order shows Check printer:
- Go to the printer. Clear any jam, and check it has labels loaded.
- Check which labels came out. Some may have printed even though their tag failed.
- In Production, choose the printer in Select printer.
- Open the order's or run's menu and choose Reprint failed jobs.
Only the serials that failed print again.
Clear a printer queue
If a printer has a backlog you no longer want, choose it in Select printer, then select Clear printer queue and confirm. Jobs still waiting on that printer are cancelled, and their orders stop showing as pending. Print them again when you're ready.